In modern engineering and manufacturing, access to accurate digital design data is essential. However, many companies still rely on physical parts for which original drawings, CAD files, or documentation no longer exist. Components may be outdated, suppliers may have changed, or designs may have evolved over time without proper records. In such situations, reverse engineering provides a reliable solution.
The reverse engineering workflow transforms a physical component into a precise digital model that can be analyzed, modified, and manufactured. This article walks through the complete process—from capturing the geometry of an existing part to delivering production-ready digital documentation—highlighting why this workflow is critical in today’s industrial environment.
Understanding the Purpose of Reverse Engineering
Reverse engineering is the process of extracting design intent from an existing object. Instead of starting with drawings or specifications, engineers begin with the finished product and work backward to recreate its digital representation.
This approach is widely used when:
- Original design data is missing or incomplete
- Replacement parts are no longer available
- Existing designs need improvement or optimization
- Legacy equipment must be maintained or upgraded
Mechanical reverse engineering plays a key role in extending product lifecycles and reducing dependency on obsolete components.
Step 1: Initial Assessment of the Physical Part
Every reverse engineering project begins with a detailed assessment of the physical component. Engineers examine the part to understand its function, operating conditions, material type, and manufacturing method.
At this stage, key questions are addressed:
- What is the part’s role in the assembly?
- Is the component worn, damaged, or deformed?
- What level of accuracy is required?
- Will the part be reproduced exactly or redesigned?
This evaluation helps define project goals and determines the appropriate tools and techniques for the workflow.
Step 2: Selecting the Right Measurement Method
Accurate data capture is the foundation of a successful reverse engineering workflow. The measurement method depends on part size, complexity, required tolerances, and surface characteristics.
Common approaches include:
- Manual measurement for simple geometries
- Coordinate measuring machines (CMM) for high-precision features
- 3D scanning for complex or freeform shapes
For intricate mechanical components, non-contact scanning methods are often preferred due to their speed and ability to capture detailed surface geometry without physical contact.
Step 3: Capturing Geometry Data
Once the measurement method is selected, the physical part is digitized. In scanning-based workflows, millions of data points are collected from the part’s surface, creating a highly accurate digital representation of its shape.
Proper setup is essential during this stage. The component may be cleaned, coated with a matte spray, or repositioned multiple times to ensure complete coverage. The goal is to capture all critical features, including holes, fillets, contours, and mating surfaces.
The output of this step is raw geometric data that reflects the real-world shape of the part.
Step 4: Processing and Cleaning the Scan Data
Raw scan data is not immediately usable for engineering purposes. It often contains noise, overlapping points, and gaps that must be corrected.
During data processing, engineers:
- Remove irrelevant or distorted data
- Align multiple scans into a single coordinate system
- Fill holes caused by occlusions
- Optimize data density
The cleaned data is typically converted into a mesh format, which represents the surface geometry using interconnected triangles.
This step ensures that the digital representation accurately matches the physical component while remaining manageable for further processing.
Step 5: Feature Recognition and Design Interpretation
At this stage, engineers analyze the processed data to identify design features such as flat surfaces, cylindrical holes, threads, slots, and complex contours. This is where engineering expertise becomes critical.
Mechanical components are rarely random in shape. Features often follow design rules related to strength, manufacturability, and function. Understanding these rules allows engineers to interpret the original design intent rather than simply copying geometry.
Mechanical Reverse Engineering focuses on this interpretation process, ensuring that the recreated model behaves like the original part in real-world conditions.
Step 6: Creating the Parametric CAD Model
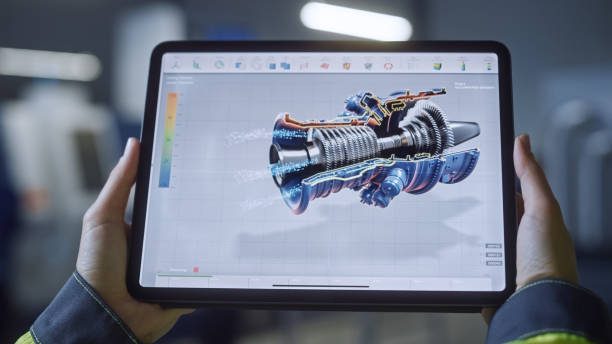
The next step is converting the mesh or point cloud data into a fully editable CAD model. Instead of relying on the mesh directly, engineers rebuild the part using parametric features.
This approach provides several advantages:
- Dimensions can be adjusted easily
- Design intent is preserved
- The model integrates with manufacturing workflows
- Tolerances and constraints can be applied
The resulting CAD model is suitable for modification, optimization, and reuse in future projects.
Step 7: Validation Against the Original Part
Accuracy is critical in reverse engineering. Once the CAD model is created, it is validated against the original scan data or physical measurements.
Deviation analysis tools are used to compare the digital model with the captured geometry. Any discrepancies outside acceptable tolerances are corrected to ensure the model matches the original part precisely.
This validation step ensures confidence before moving into manufacturing or redesign.
Step 8: Optimization and Redesign (If Required)
Reverse engineering does not always mean creating an exact copy. In many cases, the goal is to improve the original design.
Common optimization objectives include:
- Reducing weight
- Improving strength or durability
- Simplifying manufacturing
- Adapting the part for new materials or processes
Because the model is now parametric, these changes can be implemented efficiently without starting from scratch.
Step 9: Generating Engineering Documentation
Once the digital model is finalized, detailed engineering documentation is created. This includes technical drawings, dimensions, tolerances, and notes required for production and inspection.
CAD Drawing Services play an important role at this stage by converting digital models into clear, standardized drawings that meet industry and regulatory requirements.
These drawings ensure that manufacturers, suppliers, and quality teams have a consistent reference throughout the production process.
Step 10: Manufacturing and Quality Control Integration
The final digital outputs are integrated into manufacturing workflows. CAD data may be used directly for CNC programming, tooling design, or additive manufacturing processes.
Accurate digital models and drawings support:
- Efficient production planning
- Reduced setup time
- Consistent quality control
- Reliable part replication
This seamless integration minimizes delays and prevents costly errors during manufacturing.
Benefits of a Structured Reverse Engineering Workflow
A well-defined reverse engineering workflow offers significant advantages across industries:
Accuracy and Reliability
Precise data capture and validation ensure that recreated parts meet functional and dimensional requirements.
Time Efficiency
Advanced measurement and modeling techniques reduce the time needed to recreate complex components.
Cost Reduction
Early error detection, reduced rework, and fewer physical prototypes lower overall project costs.
Design Flexibility
Parametric models allow easy updates, customization, and future reuse.
Extended Product Lifecycles
Legacy parts can be reproduced or improved without relying on outdated documentation.
Common Applications Across Industries
This workflow is widely used in industries such as:
- Automotive and transportation
- Aerospace and defense
- Industrial machinery
- Energy and power generation
- Medical devices
- Heavy equipment manufacturing
Any sector dealing with complex mechanical systems or long equipment lifecycles can benefit from reverse engineering.
Challenges and Best Practices
While highly effective, reverse engineering requires skilled professionals and the right tools. Challenges may include worn or damaged parts, incomplete geometry, or tight tolerances.
Best practices include:
- Thorough initial assessment
- Choosing appropriate scanning and modeling methods
- Maintaining strict validation standards
- Collaborating closely between design and manufacturing teams
Following these principles ensures consistent and reliable results.
The Future of Reverse Engineering Workflows
As digital manufacturing evolves, reverse engineering workflows are becoming more automated and intelligent. Advances in scanning technology, AI-assisted feature recognition, and cloud-based collaboration are streamlining processes and improving accuracy.
Mechanical reverse engineering is increasingly integrated into digital twins, predictive maintenance systems, and Industry 4.0 initiatives, making it a strategic capability rather than a reactive solution.
Conclusion
The journey from a physical part to a digital model is a structured and highly technical process that combines measurement, engineering insight, and advanced CAD tools. A well-executed reverse engineering workflow enables manufacturers to recover lost design data, improve existing products, and ensure long-term operational reliability.
By leveraging mechanical reverse engineering techniques and professional CAD Drawing Services, companies can bridge the gap between legacy hardware and modern digital manufacturing. The result is greater accuracy, reduced costs, and the flexibility to innovate in an increasingly competitive industrial landscape.